

How To Remove Composite Deck Plugs
How To Install Composite Decking Using Clips
If you lot're looking for a clean look on your deck surface with no visible screws, consider using deck clips.
![]() Time
Time
Multiple Days
![]() Complication
Complication
Avant-garde
![]() Cost
Cost
$xx-fifty
Introduction
If you're looking for a clean expect on your deck surface with no visible screws, consider using deck clips.
Tools Required
Materials Required
- Composite Decking
- Deck Clips
Project step-by-step (7)
Footstep 1
Before You Get Started
- Check the decking specifications and local building codes for joist spacing. The most common is 16 inches on center. For a more than rigid feel, 12 inches on middle.
- Install blocking between each joist every 4 to six feet to reduce movement upwardly and down and twisting of the joists, using outside screws.
- Pro Tip: Screw a straight 2x4 on edge to the top of each joist before adding the blocking. This will ensure all the joists are level with each other.


Footstep 2
Starter Board
- The first board you install, the starter lath is the about of import one.
- Depending on the shape of the deck, the first board can start at the business firm or at the outer rim joist.
- Use starter clips to fasten your commencement lath or surface screws and plug the holes.
- Pro Tip: The terminal board may demand to be ripped; it may look amend confronting the house than on the outer rim.

![]()
Step 3
Installing Deck Clips
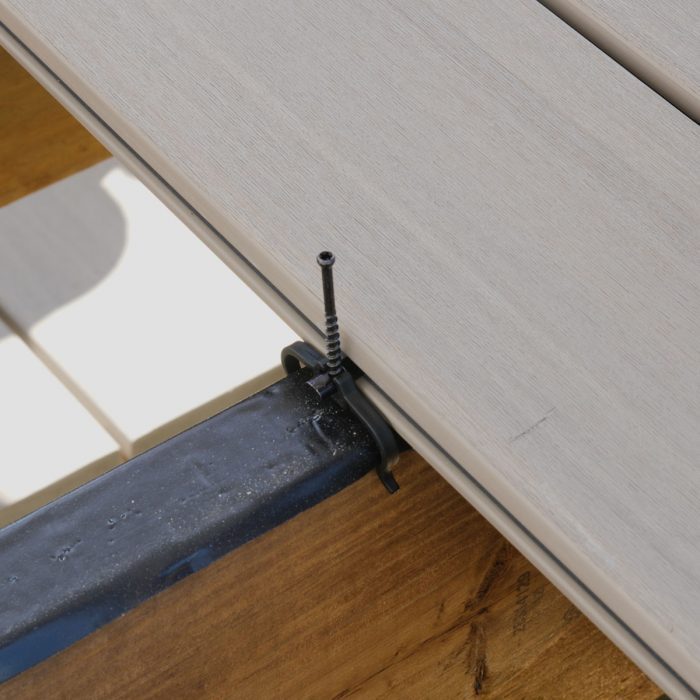
- On the inside edge of the starter board, install deck clips at every joist into the groove along the whole length of the board.
Step 4
Installing Deck Board
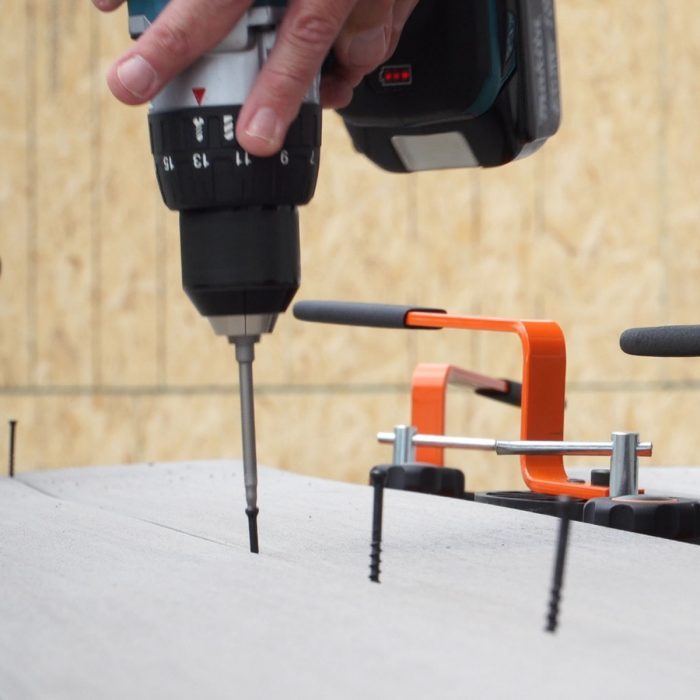
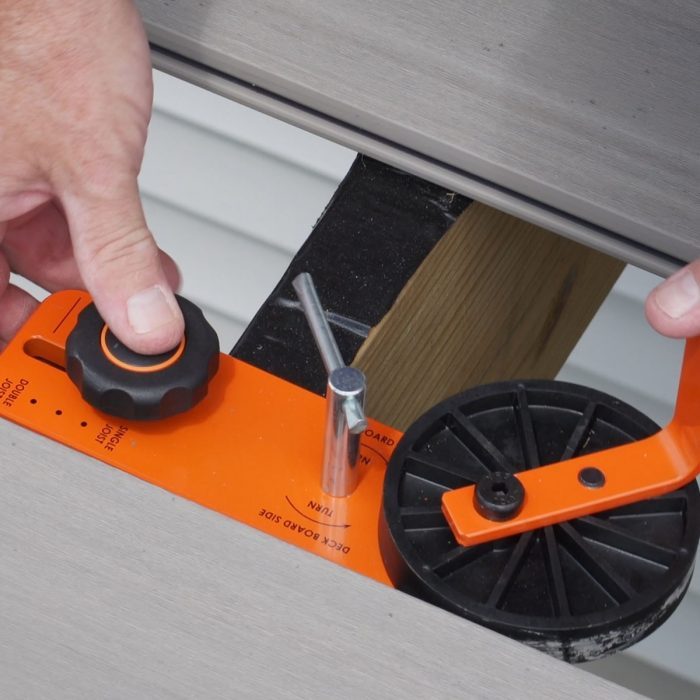
- Slide the next board up against the clips. Hold the lath tightly, putting pressure level confronting the clips. If available, use a board locking tool to aid you hold the board tight.
- Fasten all the clips betwixt the two boards securely using a drill (non an impact driver).
- Repeat the aforementioned procedure for each board.
- Pro tip: Let the boards hang over on both sides of the deck.
Stride 5
Expansion and Wrinkle
- Blended decking will expand and contract in farthermost climates.
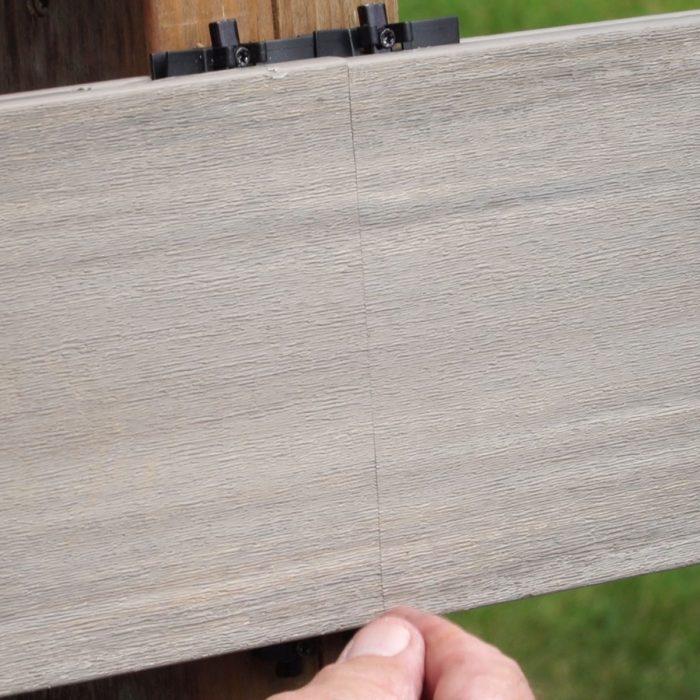
- Don't leave a gap when two board ends butt together.
- Install double joists and use four clips, two per board, where you have a butt joint.
- Pro tip: Stagger the butt joints every other row so no two seams are side by side to each other.
Pace half-dozen
Notching Around Posts
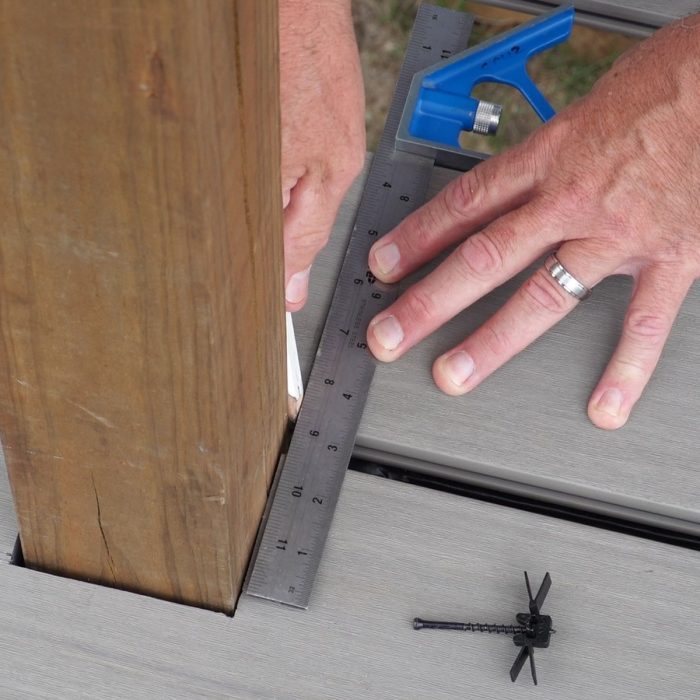
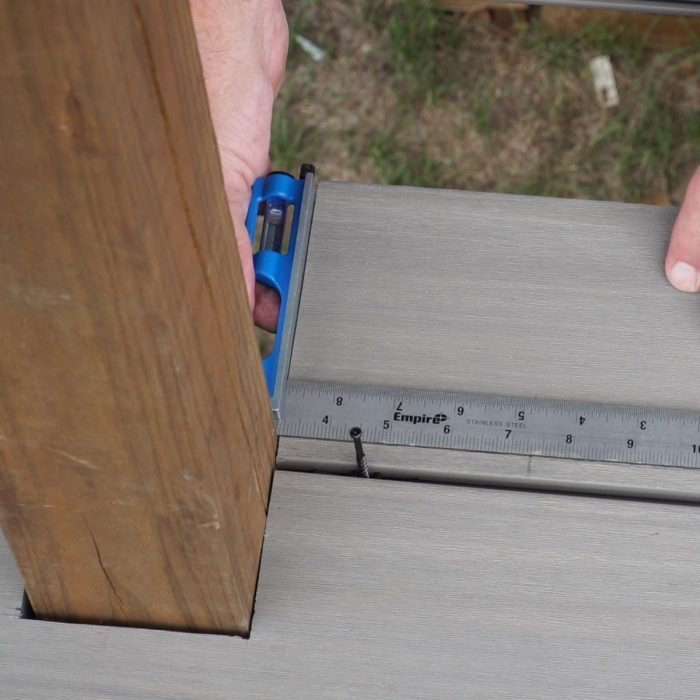
- To notch around the railing post, slide a deck board up next to the mail. Place a square against the edge of the post and draw lines on each side of the mail onto the lath.
- To notch the depth, utilise a spacer or deck clip to create the gap betwixt boards.
- Slide the end of the deck board up next to the post and place a square on the end of the deck board confronting the post. Depict a line onto the lath between your two other lines.
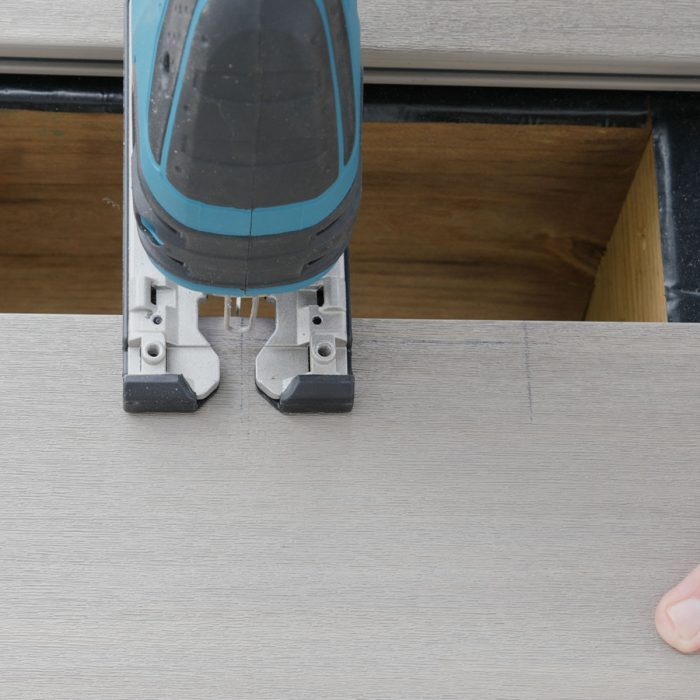
- Cut out the notch using a jigsaw.
- Pro tip: Brand the notch slightly bigger for a niggling jerk room.
Step 7
Trim Boards
- Afterward all the boards are installed, snap a chalk line and trim the ends to the desired length.
- Pro tip:Every bit you lot proceed to install deck boards, periodically have measurements to be certain the boards are parallel to the starter board.

Originally Published: Baronial 13, 2022

How To Remove Composite Deck Plugs,
Source: https://www.familyhandyman.com/project/install-composite-decking-clips/
Posted by: manoreigerstand.blogspot.com
0 Response to "How To Remove Composite Deck Plugs"
Post a Comment